San Diego and Arizona Railway/Gallery: Difference between revisions
imported>Robert A. Estremo mNo edit summary |
imported>Robert A. Estremo (add images) |
||
| Line 7: | Line 7: | ||
Image:SDA survey party August 1914.jpg|{{SDA survey party August 1914.jpg/credit}}<br />An SDA survey party, August 1914. | Image:SDA survey party August 1914.jpg|{{SDA survey party August 1914.jpg/credit}}<br />An SDA survey party, August 1914. | ||
Image:SDA tunnel 4 east.jpg|{{SDA tunnel 4 east.jpg/credit}}<br />Looking into the United States through Tunnel #4, 598 feet long. | Image:SDA tunnel 4 east.jpg|{{SDA tunnel 4 east.jpg/credit}}<br />Looking into the United States through Tunnel #4, 598 feet long. | ||
Image:SDA engine 50.jpg|{{SDA engine 50.jpg/credit}}<br />Engine number 50 of the San Diego and Arizona Rail line stands at a siding. | |||
Image:San Diego and Arizona tour group.jpg|{{San Diego and Arizona tour group.jpg/credit}}<br />A San Diego and Arizona train takes a tour group over a newly constructed bridge and track section. | |||
Image:SDA 25 tunnel 16.jpg|{{SDA 25 tunnel 16.jpg/credit}}<br />SDA #25 and train have just emerged from Tunnel #16 westbound. | Image:SDA 25 tunnel 16.jpg|{{SDA 25 tunnel 16.jpg/credit}}<br />SDA #25 and train have just emerged from Tunnel #16 westbound. | ||
</gallery> | </gallery> | ||
Revision as of 23:16, 25 July 2013
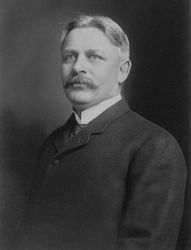
(PD) Photo: Schumacher Portraits
John Diedrich Spreckels in 1901.
(PD) Image: San Diego Union
The front page of the December 14, 1906 edition of the San Diego Union proclaims, "RAILROAD FROM SAN DIEGO TO YUMA IS NOW ASSURED."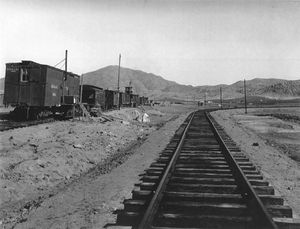
(PD) Photo: John R. Signor Collection
The boarding train at Valle Redondo, with wye to the right, January 1912.
(PD) Photo: Unknown
An SDA survey party, August 1914.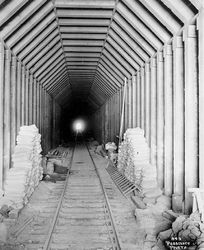
(PD) Photo: Unknown
Looking into the United States through Tunnel #4, 598 feet long.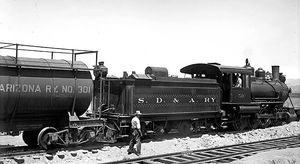
(PD) Photo: Ralph P. Stineman
Engine number 50 of the San Diego and Arizona Rail line stands at a siding.
(PD) Photo: Ralph P. Stineman
A San Diego and Arizona train takes a tour group over a newly constructed bridge and track section.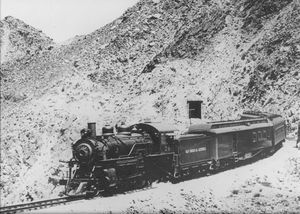
(PD) Photo: Unknown
SDA #25 and train have just emerged from Tunnel #16 westbound.


